
I created an Endpoint Manager Packaging Script Pt.2 which downloads the installer, packages it, uploads it to Intune and assigns it. But first things first, credits to Nickolaj Andersen and his module who made it all possible.
This is part 2 where we create a packaging pipeline. If you have not read Part 1, please check it out in the link below:
Part 1: Endpoint Manager Packaging Script
if you want to skip to part 3 (publishing the packages as artifacts), check out the link below: (need to write this part still)
Part 3: Publishing the packages as artifacts
Let’s get started!
Endpoint Manager Packaging Script Pt.2 – Prerequisites
There are some prerequisites in this part of the series. Your Azure tenant and Azure DevOps need to be setup in order to continue. I wrote a prepartion blog for my other series (Windows 10 Image Series). This is the link:
Prepare your Azure & Azure DevOps Environment
I have updated the script. So, if you have downloaded it from my github and haven’t got the changes. Please download it again. Link to the script in my github
Futhermore, I added Service Principal Authentication for Intune and for Azure AD. It is false by default. So, if you just run the script, it will prompt you for credentials. The blog features the steps creating the Service Principal and adding the permissions.
The IntuneWin32App module, as it sits in the Powershell Gallery, is not ready to use Service Principal Authentication. I discussed this with a friend of mine (Sander Rozemuller), he then added this to the module and created a pull request. This has not been merged yet. So, you need to use this version of the module.
Link to the module
Be sure to check Sander Rozemuller’s blog also. Link. A lot of content about automation for AVD.
After that, you are ready to start this blog!
Endpoint Manager Packaging Script Pt.2 – Goal
The goal of this blog is to create a Azure DevOps pipelines which runs the script via Service Principal Authentication. This is a screen of the result:

It is a longggg blog, Good Luck!
Creating Service Principal and assign its permissions
Firstly, we need to change the authentication part. The script is ready, be sure to download the latest version of it from my Github.
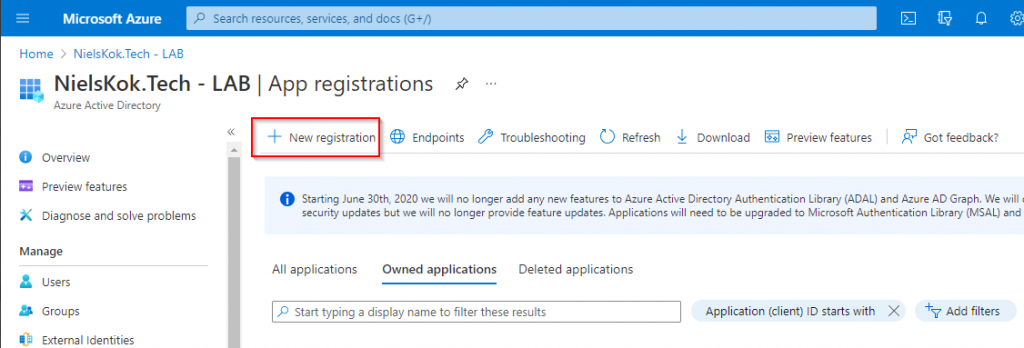
The next step is creating the Service Principal. Logon to Azure AD. and go to App registrations:

After that, click on the new registration:
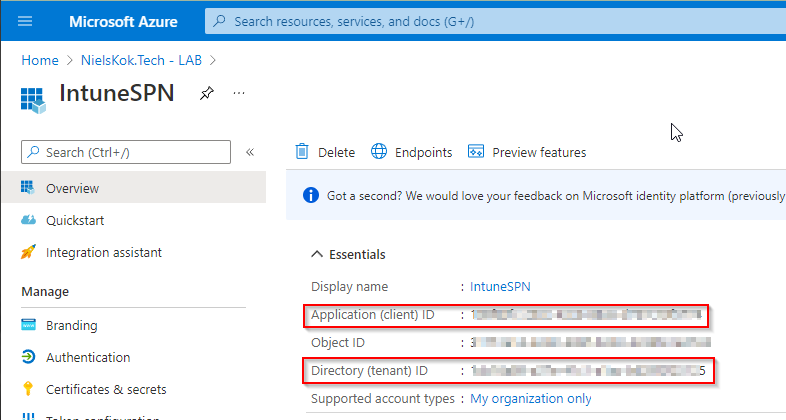
Call it “IntuneSPN” and click on register:

In addition, you see this screen. Copy these GUID’s to a notepad of some sort:
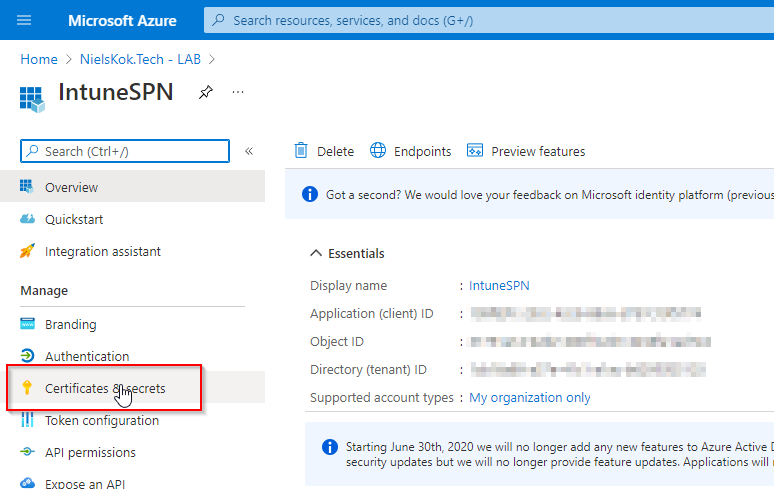
Next, go to Certificates & Secrets:
Click on “New client secret”:

Name it and click on create.
NOTE: Write down this value in your notepad:

After that, go to “API Permissions” and click on “Add a permission”:

Select “Microsoft Graph”, “Application permissions”, search for “Device” and select these permissions:

After that, you need to consent the permission. Click on this button:

We need to add a role to the Service Principal also. This gives the Service Principal permission to create groups and manage users. Go to Azure AD and select Roles and administrators:

Search for “User administrator” and add it to the IntuneSPN:


Do the same for the role “Directory Writers”:


Add a certificate
Lastly, we need to add a certificate to the Service Principal for authentication. I am going through this quite quick so if you need more information about this, please check out the Microsoft Doc.
Firsly, create the certificate locally on your machine (as admin) by using the following code:
$pwd = "USE ACCORDINGLY"
$notAfter = (Get-Date).AddMonths(6) # Valid for 6 months
$thumb = (New-SelfSignedCertificate -DnsName "YOURTENATNAME.onmicrosoft.com" -CertStoreLocation "cert:\LocalMachine\My"  -KeyExportPolicy Exportable -Provider "Microsoft Enhanced RSA and AES Cryptographic Provider" -NotAfter $notAfter).Thumbprint
$pwd = ConvertTo-SecureString -String $pwd -Force -AsPlainText
Export-PfxCertificate -cert "cert:\localmachine\my\$thumb" -FilePath c:\temp\IntuneCert.pfx -Password $pwd
You now have a certificate in this directory:

After that, log to Azure AD in powershell:
Connect-AzureAD
Next, run the following code to add the certificate to your Service Principal:
NOTE: The Object ID is the object ID your Service Principal. You can find it in the Azure AD portal:

$cert = New-Object System.Security.Cryptography.X509Certificates.X509Certificate("c:\temp\IntuneCert.pfx", $pwd)
$keyValue = [System.Convert]::ToBase64String($cert.GetRawCertData())

$application = Get-AzureADApplication -ObjectId "OBJECT ID FROM YOUR NOTEPAD"
New-AzureADApplicationKeyCredential -ObjectId $application.ObjectId -CustomKeyIdentifier "IntuneSPN" -Type AsymmetricX509Cert -Usage Verify -Value $keyValue -EndDate $notAfter
Furthermore, you need the certificate thumbprint also. Run the following code to get it:
Get-PfxCertificate C:\temp\IntuneCert.pfx
Write down the thumbprint in your notepad:

Go back to your Service Principal in Azure AD and check whether it has a certificate:

Test drive your Service Principal
Everything is in place to use Service Principal Authentication with the script. Use the following code to test drive your Service Principal Authentication:
$PackageType = "EXE"
$PackageName = "Greenshot"
$DownloadURL = "https://github.com/greenshot/greenshot/releases/download/Greenshot-RELEASE-1.2.10.6/Greenshot-INSTALLER-1.2.10.6-RELEASE.exe"
$TenantName = "TENANTNAME.onmicrosoft.com"
$Assignment = "Greenshot"
$InstallArgs = "/VERYSILENT /NORESTART"
$UninstallArgs  = "TASKKILL /F /IM Greenshot.exe; '%ProgramFiles%\Greenshot\unins000.exe' /VERYSILENT /NORESTART"
$DetectionArgs = "Get-ChildItem 'C:\Program Files\Greenshot\Greenshot.exe'"
$AuthTypeSPN = $true
$TenantID = "YOUR TENANT ID FROM NOTEPAD"
$ClientID = "YOUR CLIENT ID FROM NOTEPAD"
$ClientSecret = "YOUR CLIENT SECRET FROM NOTEPAD"
$Thumbprint = "YOUR THUMBPRINT FROM NOTEPAD"
$ModuleLocation = "YOUR LOCATION WHERE YOU DOWNLOADED THE MODULE\IntuneWin32App.psm1"


D:\GIT\NKO\public\Intune\IntuneDevOpsPackaging.ps1 -PackageType $PackageType `
                                        -PackageName $PackageName `
                                        -DownloadURL $DownloadURL `
                                        -TenantName $TenantName `
                                        -Assignment $Assignment `
                                        -InstallArgs $InstallArgs `
                                        -UninstallArgs $UninstallArgs `
                                        -DetectionArgs $DetectionArgs `
                                        -AuthTypeSPN $AuthTypeSPN `
                                        -TenantID $TenantID `
                                        -ClientID $ClientID `
                                        -ClientSecret $ClientSecret `
                                        -Thumbprint $Thumbprint `
                                        -ModuleLocation $ModuleLocation
Explanation:
PackageType: This is the type of application you want to install. In the case of Greenshot is an EXE type of application.
Package: This is the name of the application. This is the packaging foldername and this is the name of the Intune Application.
DownloadURL: The url where you can download the installer from.
TenantName: Name of your Microsoft 365 tenant. (Use accordingly)
Assignment: This can be All Users, All Devices or a Custom Name. Furthermore, when a custom name is used, a new or existing Azure AD Group is assigned to the application. In the example, we use a new custom group.
InstallArgs: Arguments to install the application silently.
UnInstallArgs: Arguments to remove the application silently.
DetectionArgs: Powershell code to detect the application. In addition, this script only needs to return a 0 for Intune to detect it as succesfully.
Newly added:
AuthTypeSPN: This is boolean value. True is for Service Principal Authentication. False is for interactive authentication. It is false by default.
TenantID: YOUR TENANT ID FROM NOTEPAD from the above steps
ClientID: YOUR CLIENT ID FROM NOTEPAD from the above steps
ClientSecret: YOUR CLIENT SECRET FROM NOTEPAD from the above steps
Thumbprint: YOUR THUMBPRINT FROM NOTEPAD from the above steps
ModuleLocation: The downloaded module from the prerequistes.
Endpoint Manager Packaging Script Pt.2 – Pipeline
Creating Keyvault
Firstly, we need a place to store our secret, thumbprint, client ID and tenant ID. We use Azure Keyvault to do so, we can leverage this keyvault in Azure DevOps to grab our secrets in the Pipeline.
Log on to the Azure Portal.
After that, search for “Key vault” and create a Key Vault


Name the Resource Group and Keyvault:

Important: We need to add an “Access Policy” for the our Service Principal which is connected to the Azure tenant. This is not the IntuneSPN!. This is the Service Principal you set up in the prerequisites/preparation.
Click on “Add Access Policy”:

Select the following acces policy:

I leave the networking to public for the moment:

In addition, if you want to restrict this, make Azure DevOps can access to retrieve the secrets later on.
The keyvaut is created and it is time to add our secret to this Keyvault.
Firstly, create a secret:

Add a secret:

Repeat this process for the Thumbprint, App ID and the Secret. After that, you need to have the following data in your keyvault:

Adding keyvault to Azure DevOps
The next step is to add the Keyvault to Azure DevOps.
So, log on to Azure DevOps. (You created this in the prerequisites)
After that, go to library:

Add a variable group:

Name the variables group, select “Link secret from an Azure Keyvault as variables”, select the subscription and keyvault and click on add:

Select all secrets and click on Ok:

Lastly, click on Save:

Creating the Azure DevOps Pipeline
Firstly, we need to upload the Powershell script from my Github to the Azure DevOps repository.
Create a seperate folder and put the powershell script there. This should be the result:

After that, we need to put the custom module on the DevOps agent. This is the module from the prerequisites. Since I use a windows based agent, this is quite easy. Just copy the files over the machine and copy the path of the .psm1 file:
NOTE: This is only necessary until the pull request from Sander Rozemuller is approved and merged by Nikolaj. When that is completed we can just download the module from the PSGallery.

Next, add the certificate from the Service Principal to the DevOps agent also. Grab it from your C:\Temp:

Copy it to your DevOps agent and double click it.
After that, add it as local machine:

Click next:

Enter the password:

After that, click next:

NOTE: You can also do this via Azure DevOps via Secrets. I didn’t want to make the blog more complicated. I think it is complicated enough.
Lastly, add the following file from my Github to your Azure DevOps Repository. This is YAML file which holds the configuration for the pipeline.

It is now time to create the actual pipeline. Go pipelines:

After that click on New pipeline:

Select your repository:

After that, select existing file:

Select the IntunePackaging.yml file:

NOTE: You need to replace ‘YOUR AGENT POOL NAME’ in the YAML code with your own Agent Pool Name:

After that, you need fill the correct path to your .ps1 file for the packaging script:

Running the Pipeline
After all that! You are finally ready to run the pipeline. Click on Run!

After that, you can fill in the variables. Just like in part 1:
It is the same output as you run the script manually but then in Azure DevOps:


I hope you guys made it to the end! Endpoint Manager Packaging Script Pt.2
Check out the other parts:
1. Part 1. Endpoint Manager Packaging Script
3. Part 3: Publishing the packages as artifacts
Magical ! Thanks ! very great post !
I just finishing part1 and everything looks work well !
Thanks mate!
Hi Niels , i am suffering this error “Connect-MSIntuneGraph : A parameter cannot be found that matches parameter name ‘ClientSecret’. ” , do you know could be the cause ? the error is in the line :
”
Connect-MSIntuneGraph -TenantID $TenantID -ClientID $ClientID -ClientSecret $ClientSecret
”
**************************** LOG *****************************************
[=================================================] 100% INFO Done!!!
VERBOSE: Successfully created Win32 app package object
Name : Greenshot.exe
FileName : IntunePackage.intunewin
SetupFile : Greenshot.exe
UnencryptedContentSize : 1702768
Path : C:\Packaging\Greenshot\Output\Greenshot.intunewin
Connect-MSIntuneGraph : A parameter cannot be found that matches parameter name ‘ClientSecret’.
At C:\test\IntuneDevOpsPackaging.ps1:292 char:71
+ … neGraph -TenantID $TenantID -ClientID $ClientID -ClientSecret $Client …
+ ~~~~~~~~~~~~~
+ CategoryInfo : InvalidArgument: (:) [Connect-MSIntuneGraph], ParameterBindingException
+ FullyQualifiedErrorId : NamedParameterNotFound,Connect-MSIntuneGraph
Greenshot.intunewin
WARNING: Authentication token was not found, use Connect-MSIntuneGraph before using this function
THNAKS A LOT!!!!!!
You need to enter the client secret for service principal authentication or use interactive authentication to connect to MS Graph.