AppVentiX is updated. It can now deploy signed App Control policies with ease. This is a big thing because signed App Control policies make your environment significantly more secure!
For people new to AppVentiX and App Control please check out my previous post. This post takes you through the setup and how everything works. If you are new to App Control and signing. Please check out this post: NielsKok.Tech: Signed Policies for App Control
This blogpost is dedicated to AppVentiX using Signed App Control policies. So, I assume you already set everything up regarding AppVentiX and Microsoft Azure (Artifact Signing Account) because I’m only showing the configuration for the AppVentix side. Again, please check out the previous posts mentioned above for the setup. It covers everything.
So, why AppVentix? App Ventix makes it very easy for you to deploy App Control.
It centralizes logging, when something is blocked by App Control you have a central console to see all logs from all devices and create policies based on those logs.
Also, the certificate needed for deployment is distributed via AppVentiX. No need for Intune configuration policies. The application does everything for you. In addition, it also helps you to set up the certificate. That may be a self signed certificate or a certificate from an Azure Artifact Staging account.
AppVentiX Signed App Control configuration
Again, yes again, I assume you already set up AppVentiX. You have a machine group with your Intune Machines, and you already enabled the Entra ID integration to authenticate to your blob storage. You already pushed the AppVentiX agent to your machine and everything is communicating properly. If this is not the case, please use the blogs mentioned above.
So, the setup.
We go to Machine & Inventory (1), select a Machine Group (2), and click on Machine Group Configuration (3):

Make sure the appropriate machine group is selected(1), and click on Configure Agent for selected Machine Group(2):

After that, the agent configuration shows and you must make sure that App Control is enabled and that you only allow signed App Control policies:
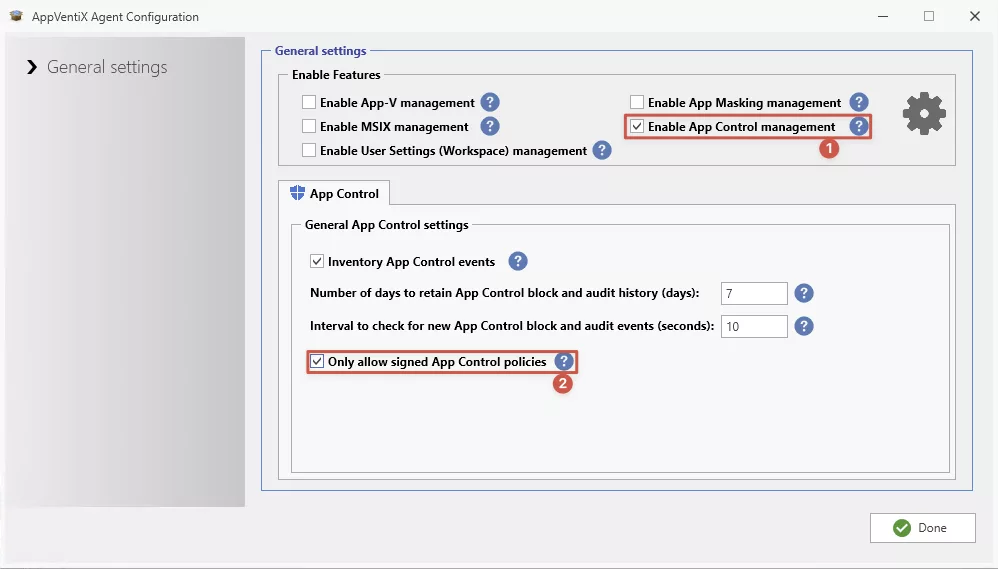
You will probably see this message:

No worries, next, we set up the certificate to sign the policies. Go back to the central view and click “Configure Certificate for Policy Signing”

You have 2 options. A locally self signed certificate. The other is an Azure Artifact Staging account. I’ll show you both options.
Locally Self Signed Certificate
Firstly, the local self signed certificate, fill out the details and click “Generate and save certificate”:

As a result, you will see this message:

Also, this makes the certificate available on all devices automatically.
Artifact Staging Account
Since the Azure Artifact Staging account is the recommended route, we take that one. Click “Configure Azure Artifact Signing”:

After that, I’ll pick the automatic one and let AppVentiX create everything for me.

In addition, the setup checks whether all prerequisites are available. If not, use “Install Missing Modules”:

As a result, the required components are available. Click next to continue:

It asks you to sign in to Azure, click the button, it opens a browser and let’s you sign in. After that, click next.

Select all the appropriate settings:

So, the Azure Artificat Signing account is created automatically but there is one manual step. The Identity Validation Profile. The AppVentiX wizard guides you through it:

When you click “Open Identity validations in portal” you are immediately guided to this page. Select Identity validations here:

Create a new Private Trust identity:

Enter the information:

Copy the identity validation id:

Paste it in to the wizard:

It might ask you to sign in again but after that it shows this message:

The certificate for signing App Control policies is now correctly set up!
You can use my previous post for detailed information on how to create App Control policies via AppVentiX!
Let’s move on to the demo!
AppVentiX Demo
Firstly, I want to show you the additional features in the management console.
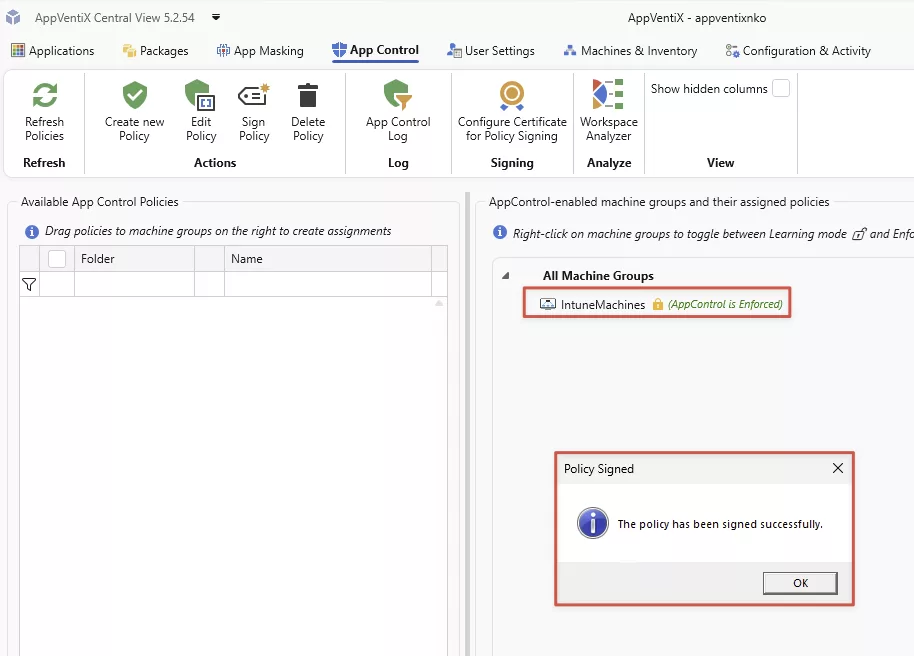
When App Control in AppVentiX is in learning mode and you want to enable enforced mode it asks you to resign the base policy to make sure the correct certificate is used:


After that, App Control is in enforced mode and the policy is signed succesfully:

On the client we only run the Workspace refresh:

And we see updates for App Control policies:

Let’s check it out with the CiTool!
Run this command:
citool.exe --list-policies
We see a signed App Control policy:

The name is still quite generic. I gave feedback about this. I expect that this is more recognizable in the future.
If we try to install an application like “Google Chrome” we see this message:

And, of course, we also see this in the AppVentiX console:

There is one more feature I want to talk about. That is editting your base policy. Previously AppVentiX managed the base policy entirely and you couldn’t change it.
Now, when you right click the machine group in the App Control pane this button is available:

This allows you to update signing of your base policy (1), it also shows you the deployed version (2):

You see the same version when running the CiTool:

That’s how you can match the version but still, a more recognizable name would be nice.
Lastly, it also allows you to update the policy settings which is very usefull feature:

That concludes my post about App Control and AppVentiX. I think it’s awesome and you should surely check it out!