Why use signed policies for App Control? Signed App Control policies give organizations the highest level of protection available in Windows. This is designed to detect if someone or something tampers with your policies. If so, that result in a blue screen or boot failure. This makes it much more difficult to remove App Control policies. More specifically, changing a signed policy requires both administrative privilege, and access to the organization’s digital signing process, making it difficult for an attacker who has gained administrative privilege to tamper with the policy. That protects against the LOLbin attack to disable defender using an App Control policy.
So, what does that attack look like:

They basically block defender but the application itself keeps running and updating. So, it might seem to your Intune environment that these devices are still healthy & Compliant. Check out this Youtube video for details about the attack.
This is just an example, there are way more attacks possible if you don’t sign your App Control policies.
Also add these to your App Control policy. These are the known bypasses for App Control and how to block them.
Note: Secure Boot must be enabled for the signed policy to be effective.
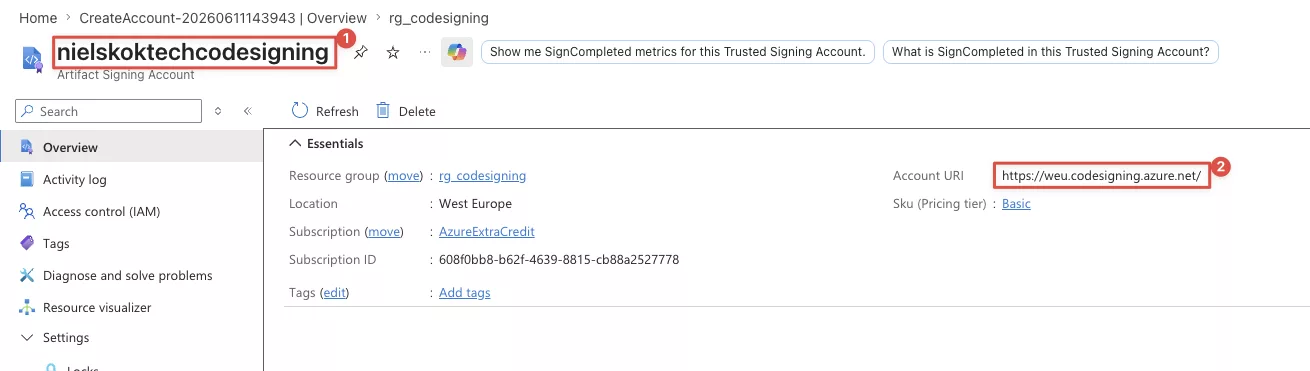
Artifact Signing Account in Azure
We use an artifact signing account in Microsoft Azure to create a private root and code signing certificate. This is recommended method by Microsoft.
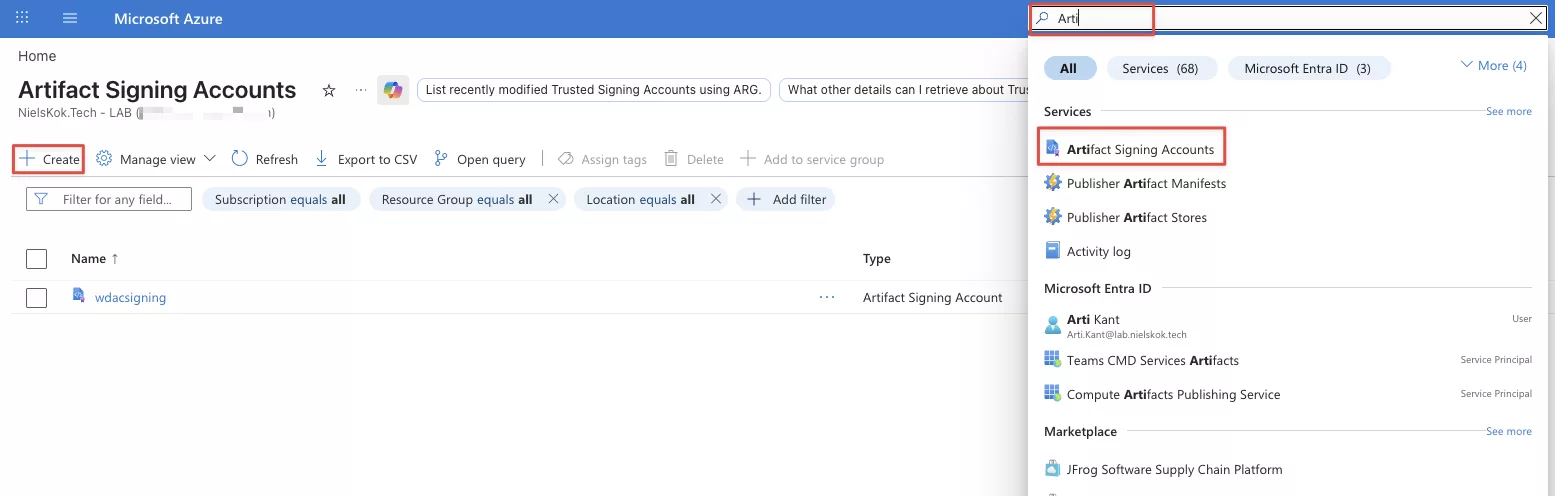
Please create a new Artifact Signing Account in Microsoft Azure. Use the search bar to find to appropriate service and create a new account:
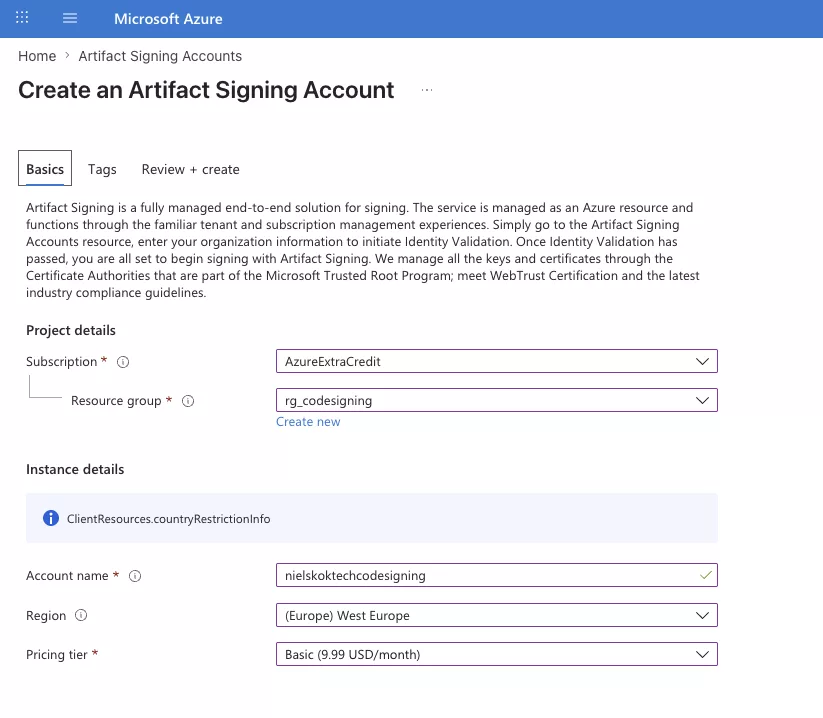
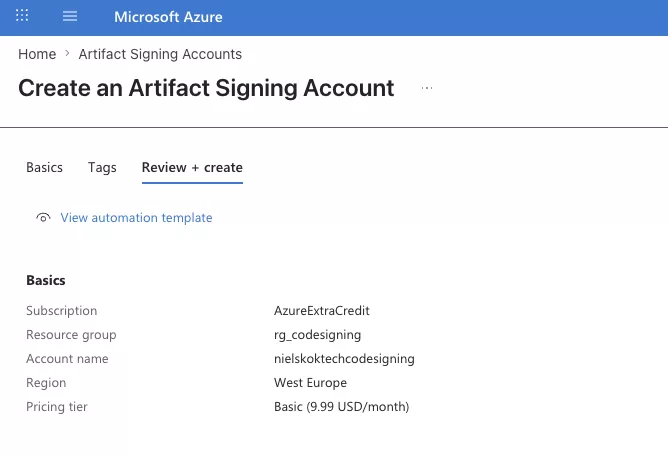
Fill out the details and click on review and create:
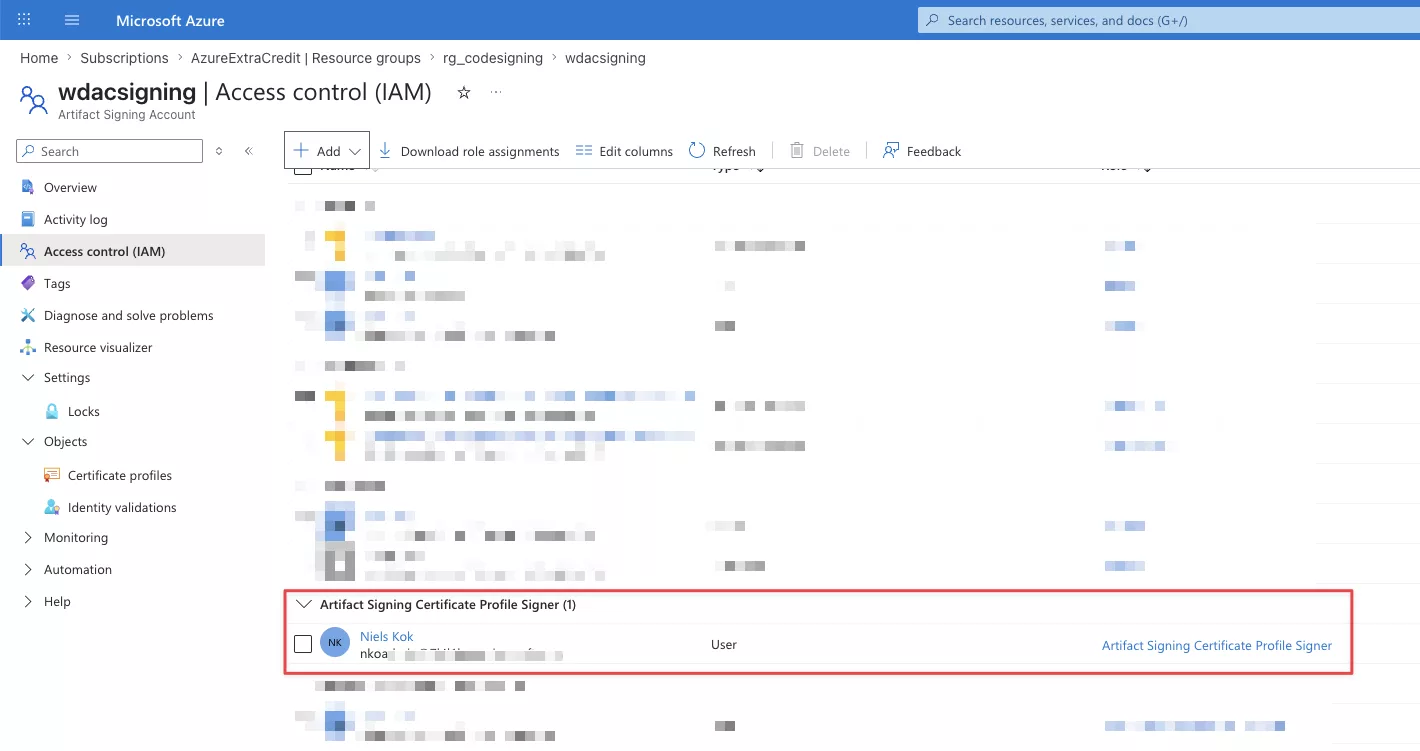
Also, please assign this role to the user account you want to grab the certificate with:
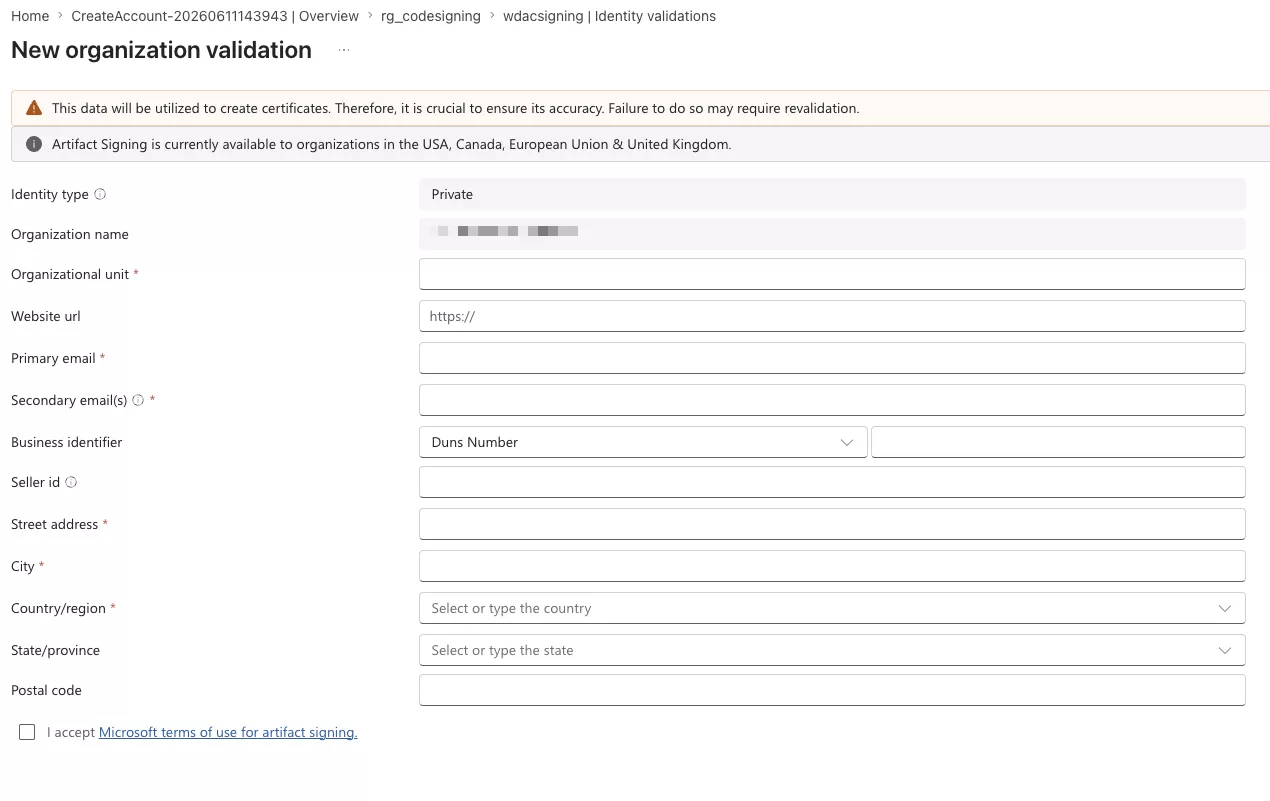
Next, we add an Identity validation to the Artifact Signing Account. Please create an private organization wide identity:
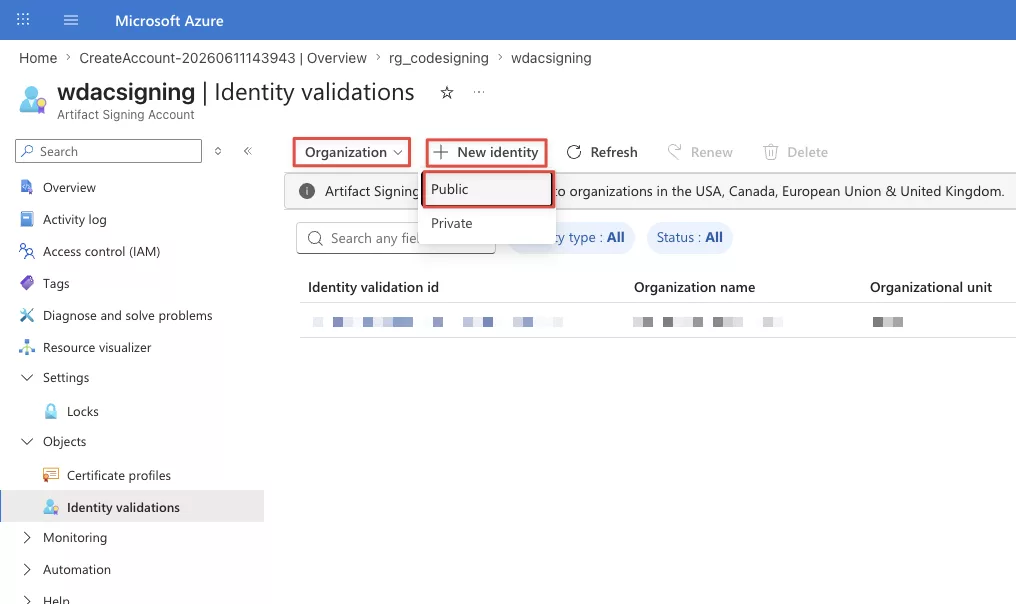
We only going to use this internal purposes, sign our App Control policies, so we don’t a public certificate. This does imply that we need to deploy the root certificate created by certificate profiles which we create next.
Pleas fill out the information according to your organization:
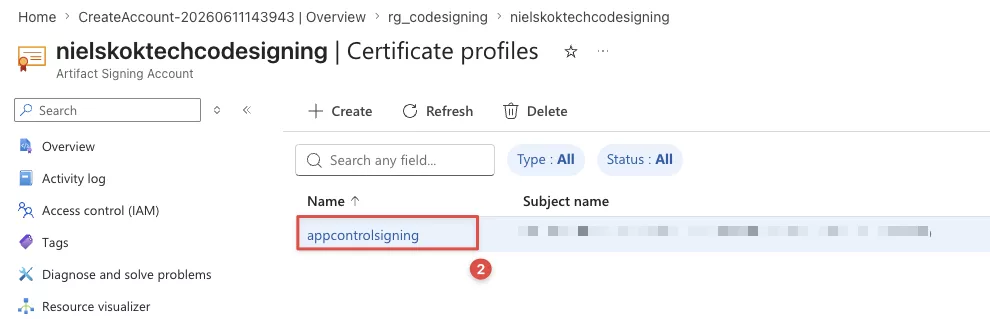
After that, create the certificate profile:
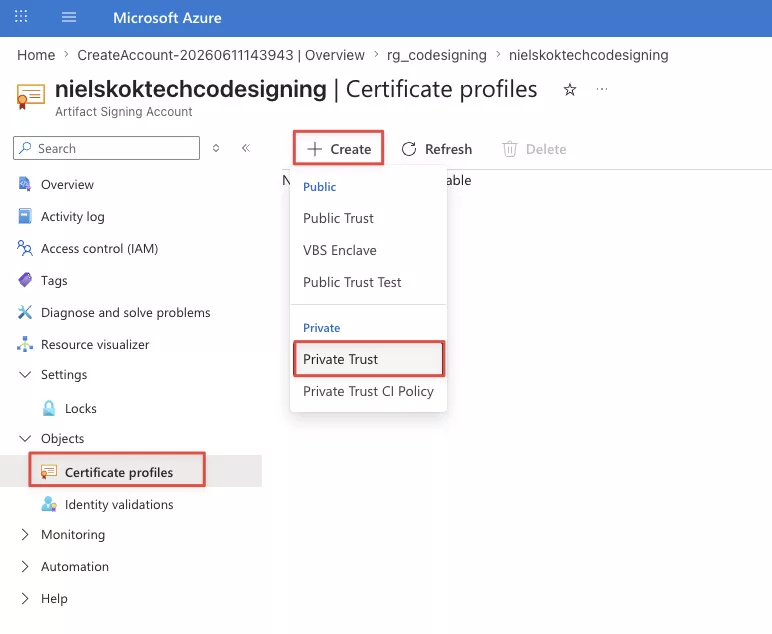
Enter a name and selected your identity created earlier:

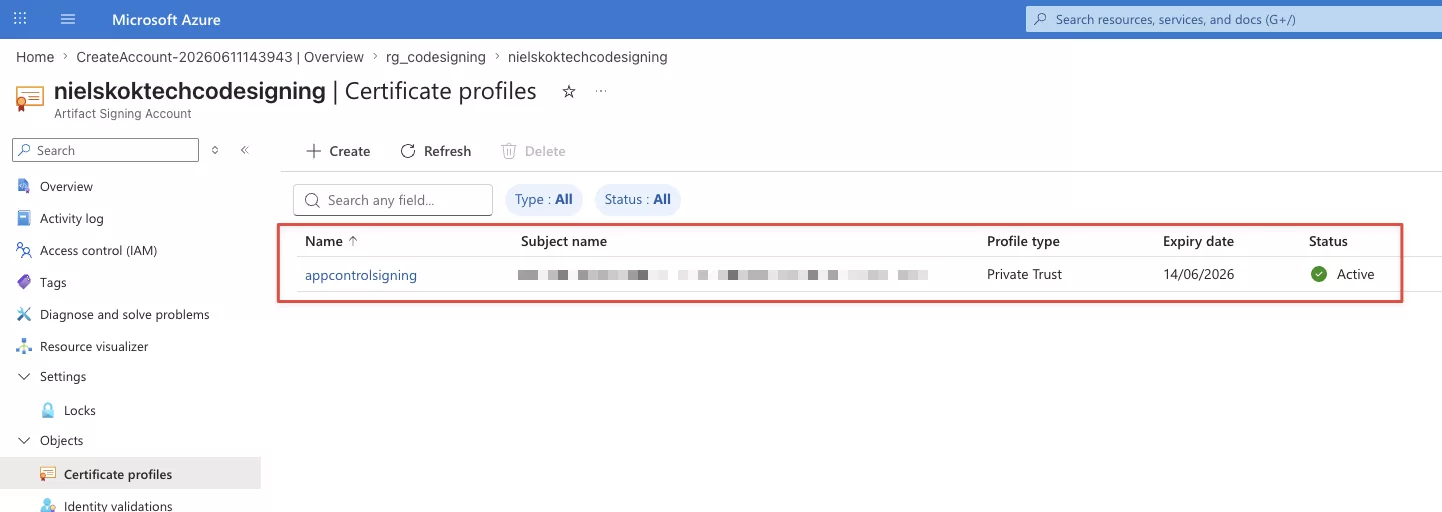
As a result:
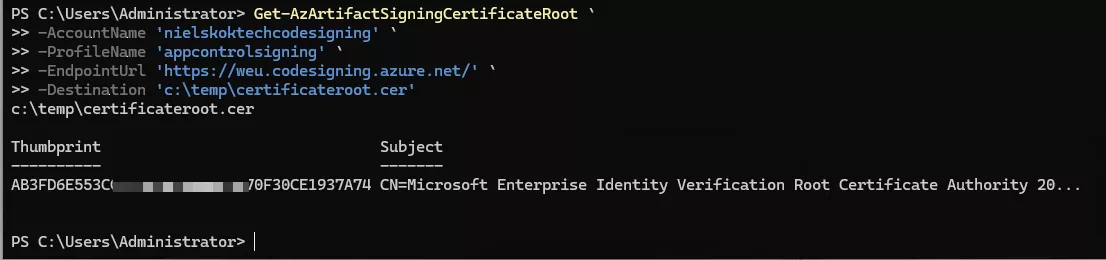
We must download that root certificate to be able to deploy it to Microsoft Intune later.
Install the Az.ArtifactSigning module, authenticate to Microsoft Azure and grab the certificate. Use these commands to do so:
NOTE: Use PowerShell 7!
Install-Module Az.ArtifactSigning -force

Connect-AzAccount

Get-AzArtifactSigningCertificateRoot `
	-AccountName 'nielskoktechcodesigning' `
	-ProfileName 'appcontrolsigning' `
	-EndpointUrl 'https://weu.codesigning.azure.net/' `
	-Destination 'c:\temp\certificateroot.cer'
AccountName is the Artifact Signing Account Name (1)
ProfileName is the name of the Certificate Profile (3)
EndpointUrl is the Account URI (2)
Command output:
And the certificate:
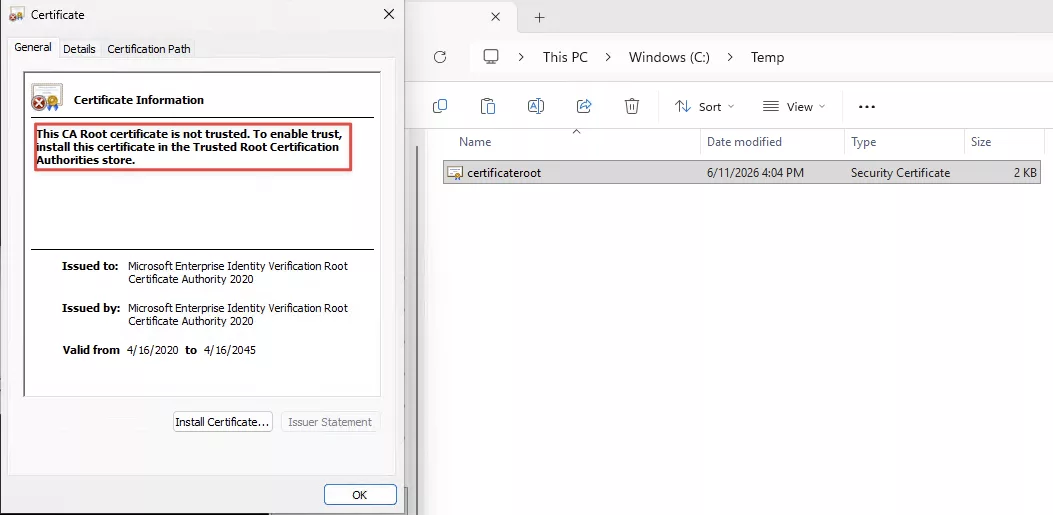
As the certificate states this is not trusted by default. We must add this to the “Trusted Root Certification Authorities store” on all of our devices. We are going to do so in the next chapter.
As an MSP could you use the same code siging certificate for all your customers? You could but you could also create a certificate profile per customer in your Artifact Signing Account. The latter would be best but I’ll leave it up to you.
Create and sign the policy, and deploy via Intune
Firstly, we must create an App Control policy. We are going to do so with the App Control Policy wizard. It’s created by Microsoft. It’s available here.
Start the App Control Policy Wizard, create a new policy, pick the multi policy format, and create a base policy. After that, select the “Allow Microsoft Mode”:
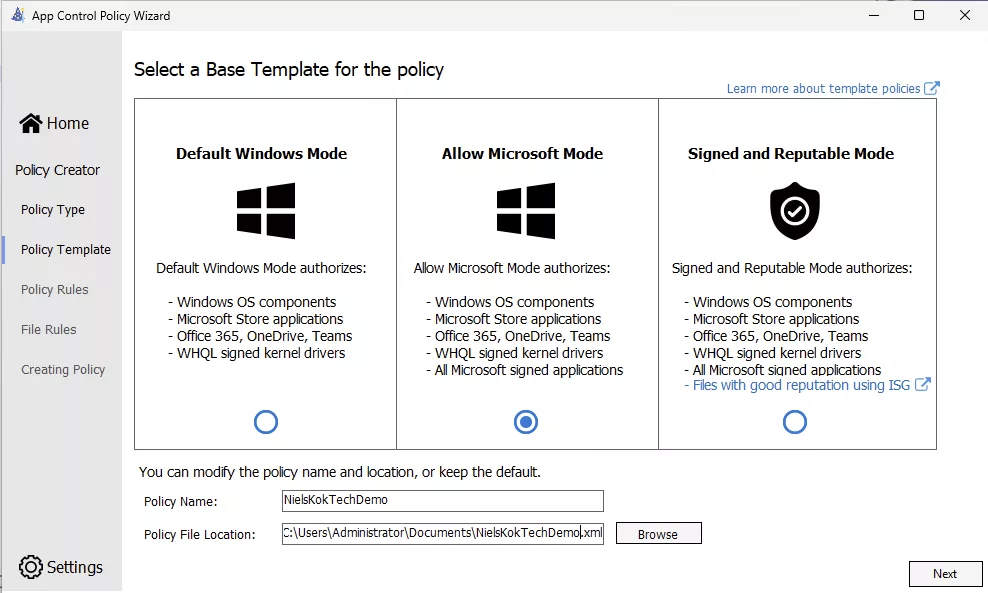
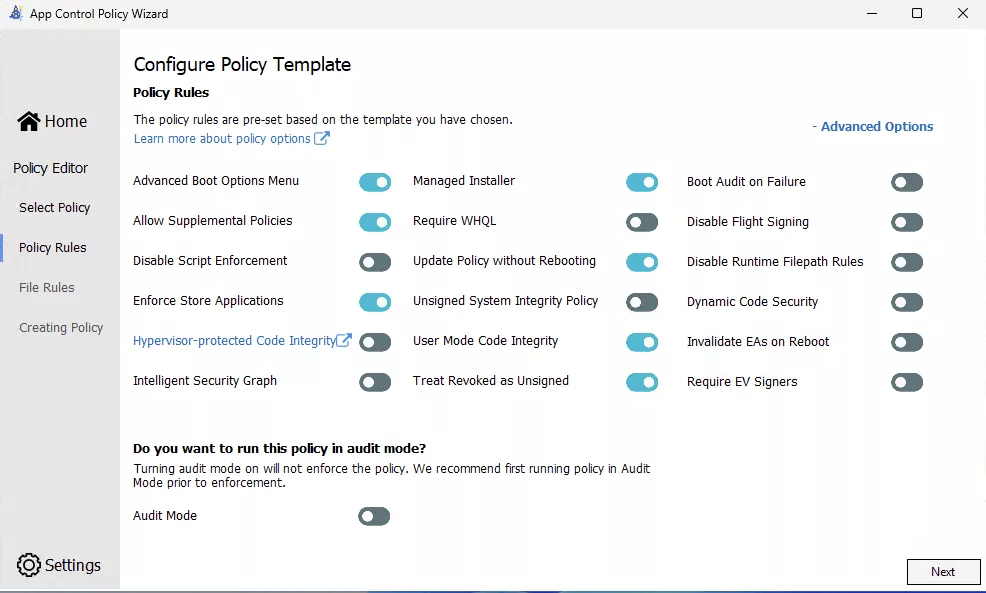
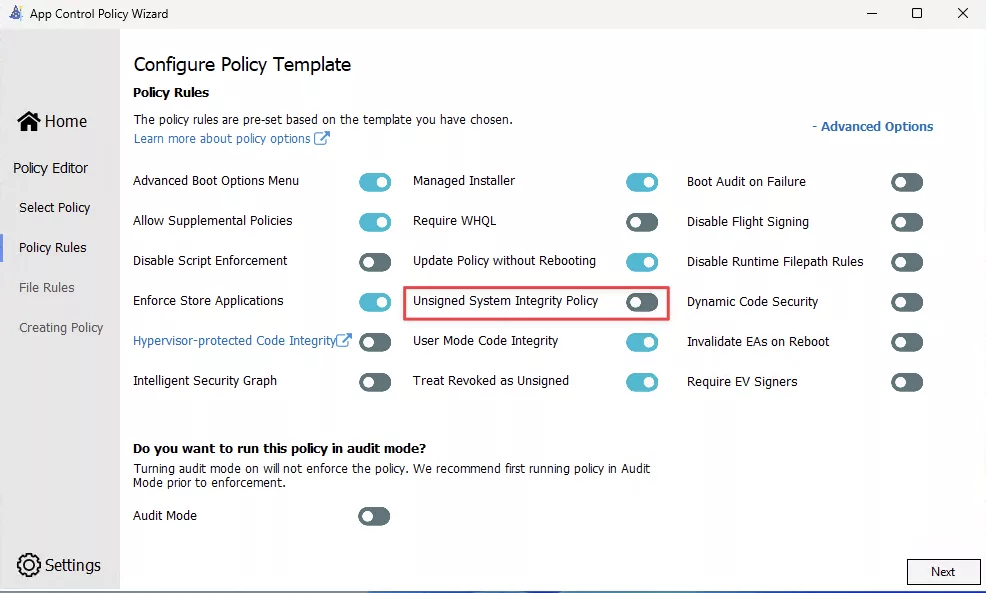
Choose these policy options, this post isn’t about the best settings for App Control, it purely making sure the signage works and the policy can’t be removed:
This is the result:
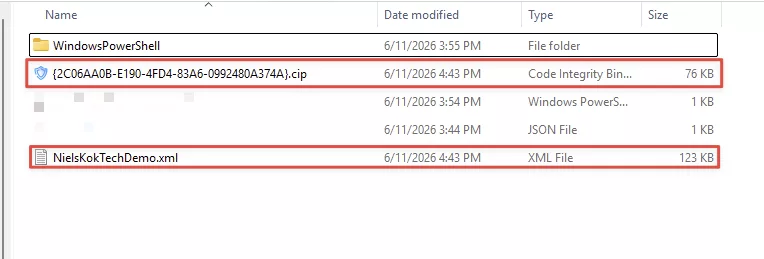
NOTE: If a .cip file is not available you can convert it to a .cip file by using these commands:
Add-SignerRule -FilePath "C:\Users\Administrator\Documents\NielsKokTechDemo.xml" -CertificatePath "C:\Temp\certificateroot.cer" -Update -Supplemental

ConvertFrom-CIPolicy -XmlFilePath "C:\Users\Administrator\Documents\NielsKokTechDemo.xml" -BinaryFilePath "C:\temp\NielsKokTech.cip"
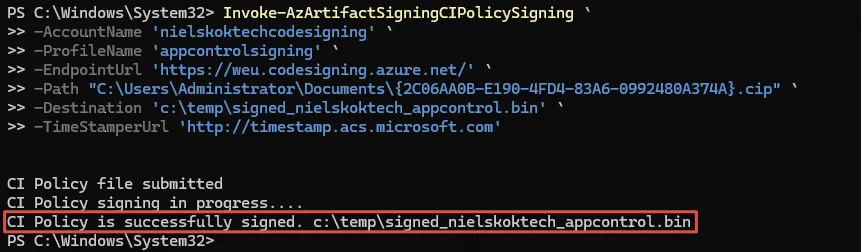
After that, we sign the policy with this command, it need the same information as the command before so I am not elaborating on that.
Invoke-AzArtifactSigningCIPolicySigning `
-AccountName 'nielskoktechcodesigning' `
-ProfileName 'appcontrolsigning' `
-EndpointUrl 'https://weu.codesigning.azure.net/' `
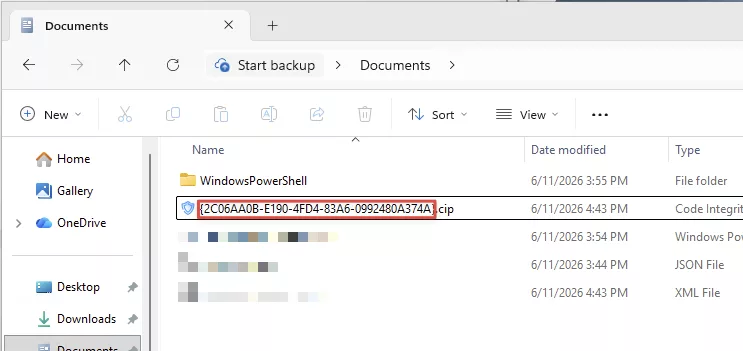
-Path "C:\Users\Administrator\Documents\{2C06AA0B-E190-4FD4-83A6-0992480A374A}.cip" `
-Destination 'c:\temp\signed_nielskoktech_appcontrol.bin' `
-TimeStamperUrl 'http://timestamp.acs.microsoft.com'
As a result, the policy is signed:
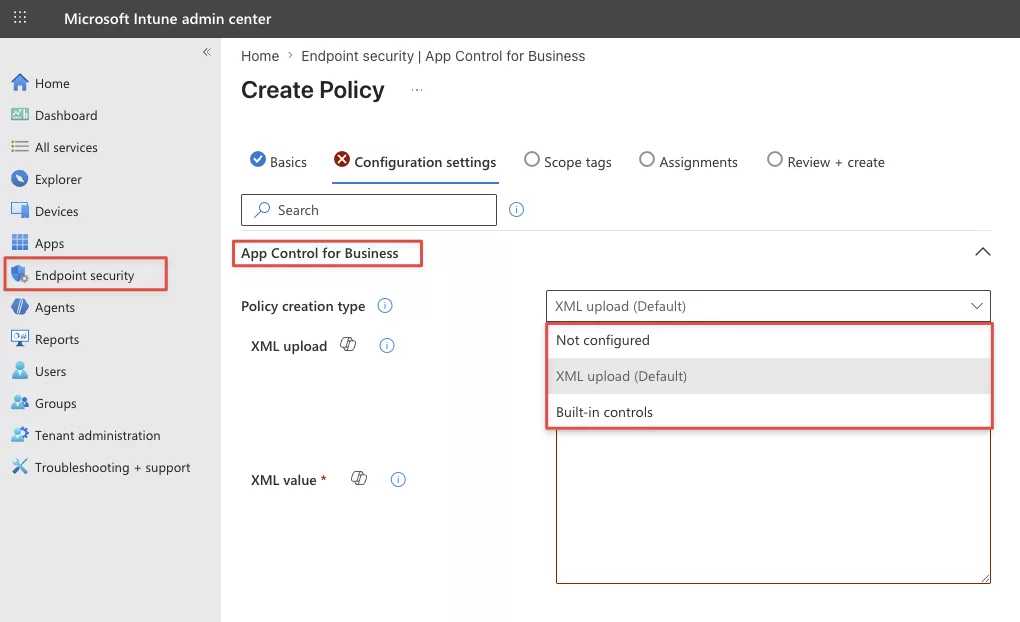
So, the output is a .bin file. We can’t convert this since we then haven’t got a signed policy anymore. That would be foolish. We can’t upload that using the App Control for Business blade in the Endpoint Security section. That only accepts XML and built-in controls:
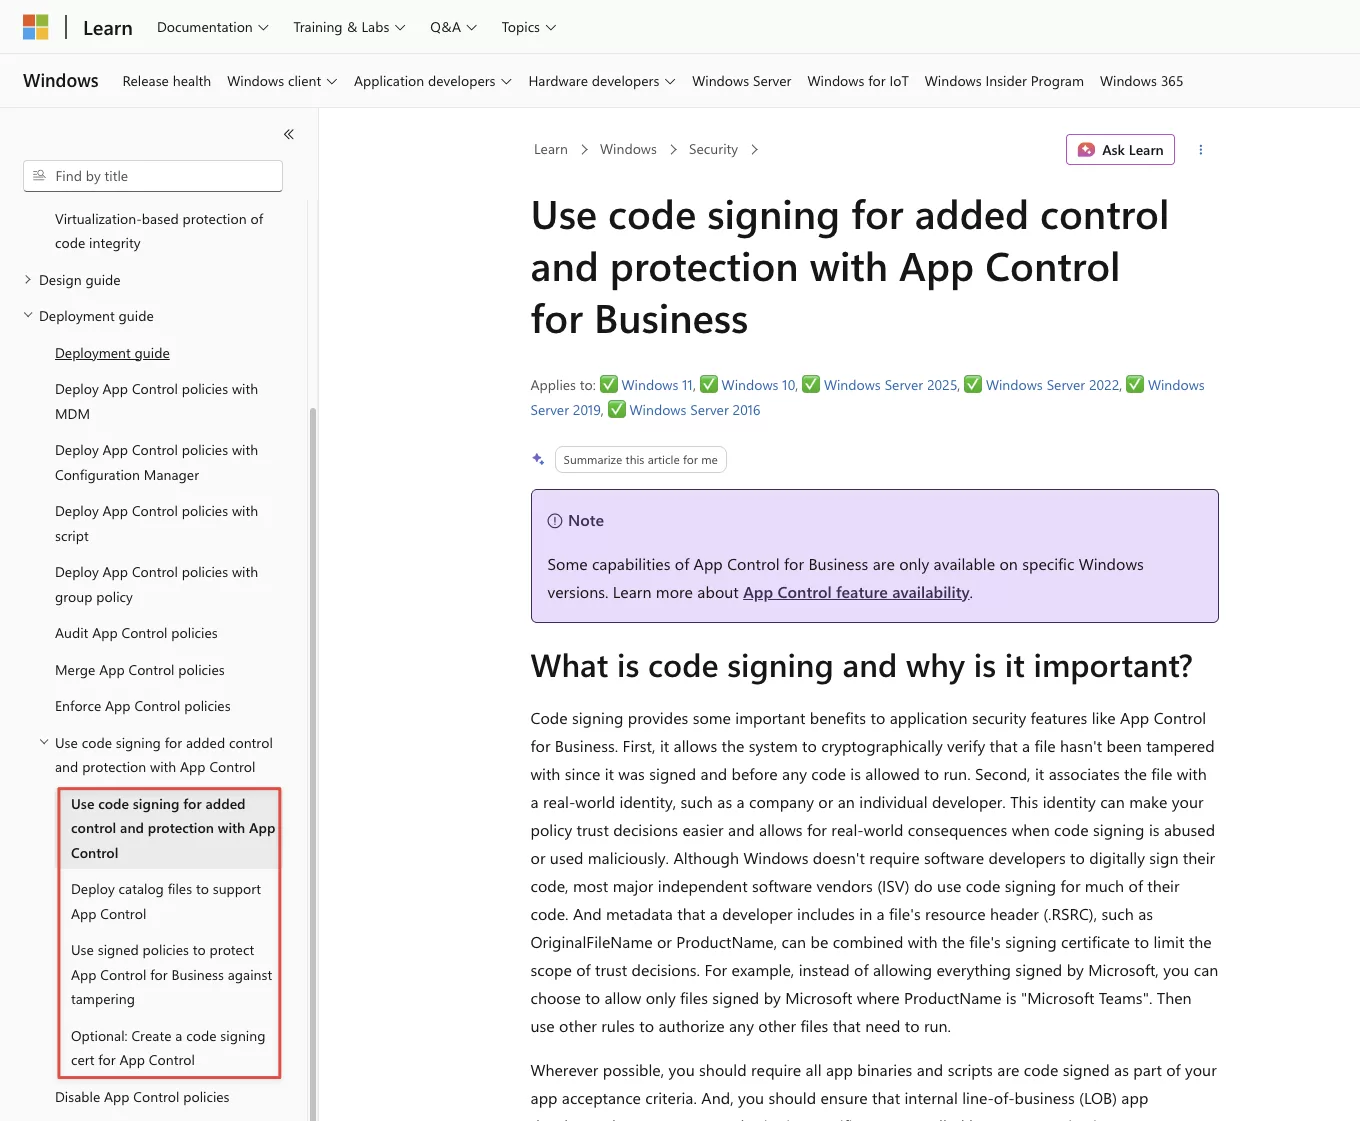
The interesting part is that the Microsoft Docs are very unclear about this. The App Control for Business Learn articles never mention how to use the Intune Controls to deploy signed policies. It could be me but I can’t find the deployment guide for signed App Control policies for Intune. I used this source and all the articles next to it:
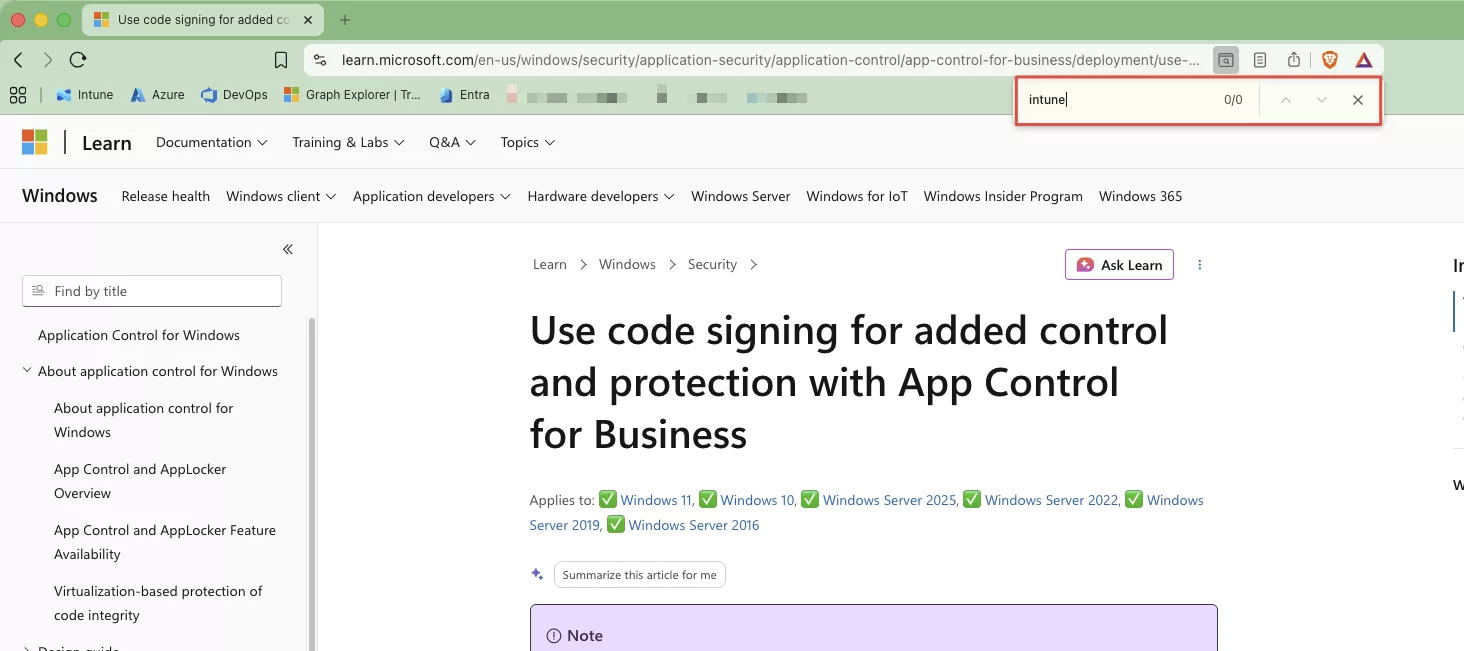
It doesn’t even have the word “intune” in it:
I guess we must the CSP to deploy the signed policies. This is the Microsoft Learn article about that:
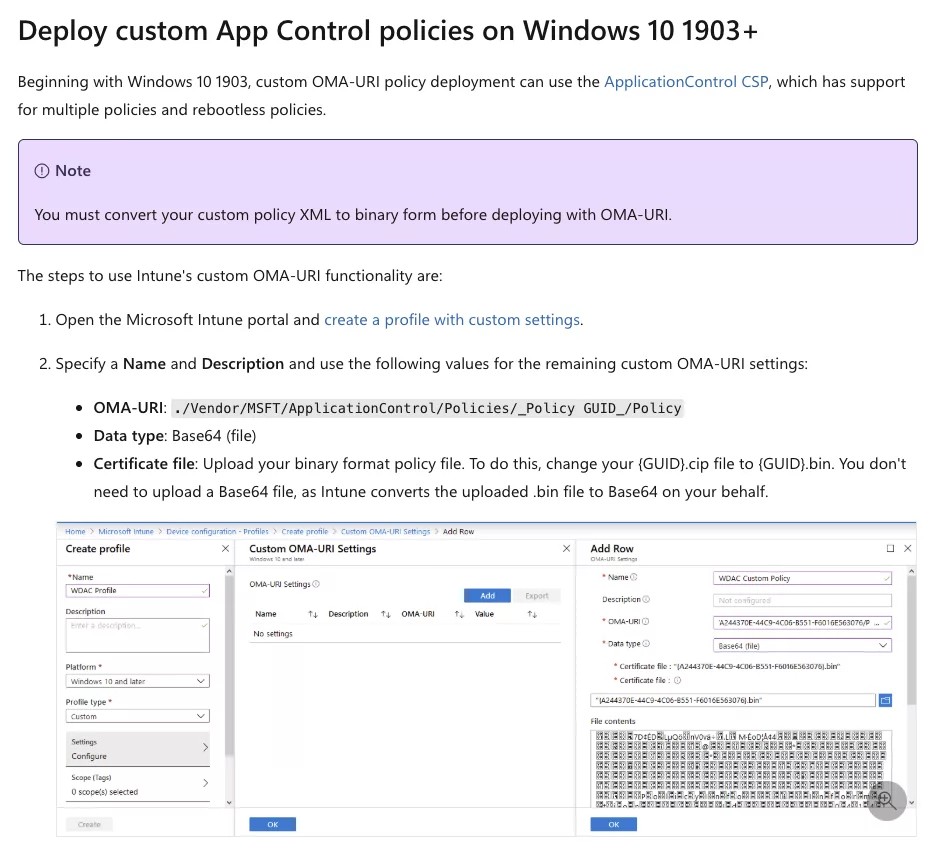
So, I guess we are using that. It’s a shame though, this means that the experience is as rough as with Applocker.
Create a new custom policy in Microsoft Intune:
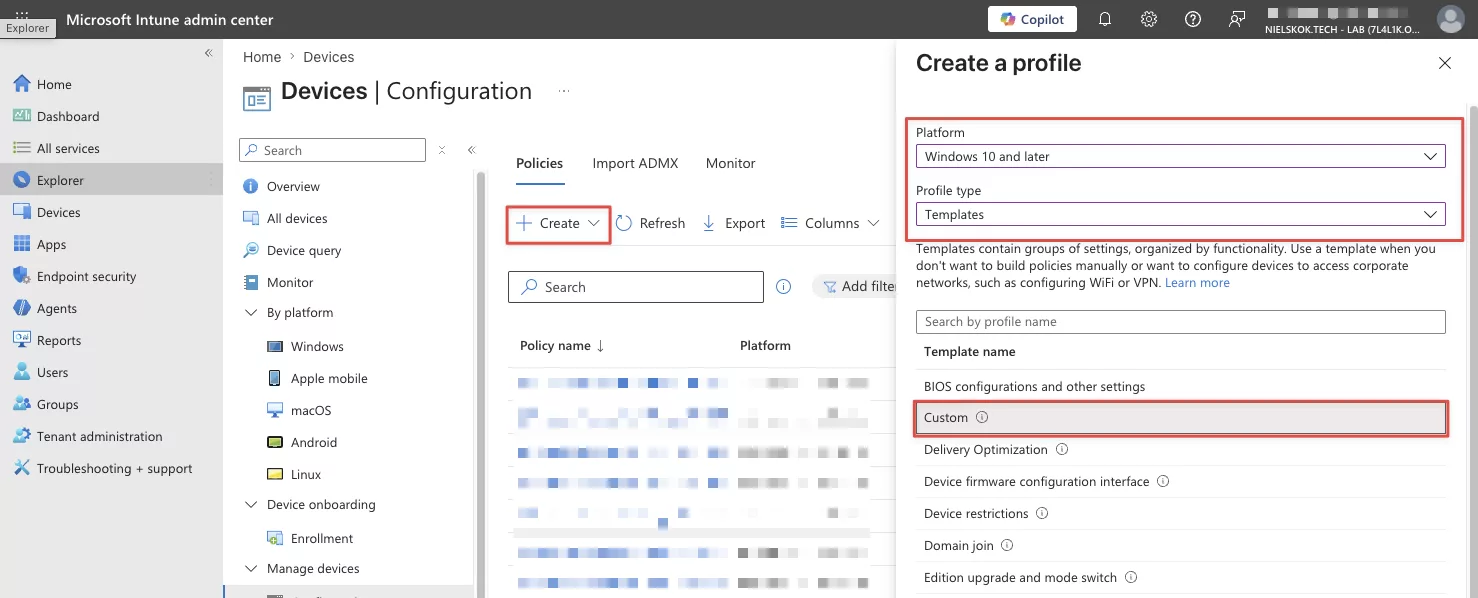
Give it a name and enter this in the configuration settings:
OMA-URI: ./Vendor/MSFT/ApplicationControl/Policies/_POLICY_GUID_/Policy
Grab the policy GUID from the original file (or grab it from the original XML):

Assign the profile and create it.
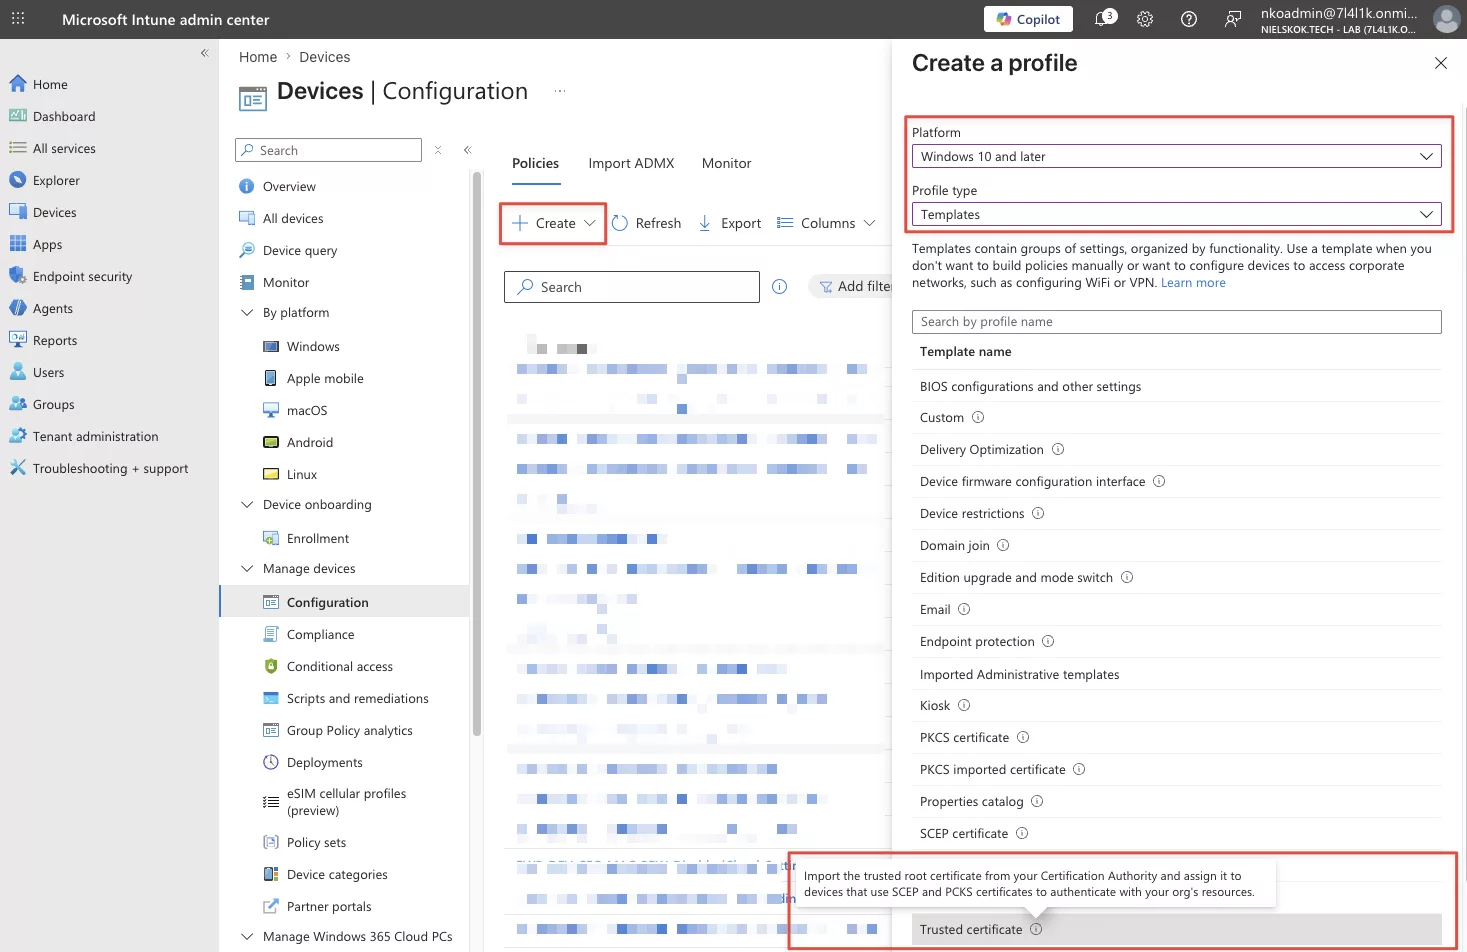
After that, we also must create a profile for our root certificate we exported earlier:

Assign the policy and click create.
Demo Signed Policies for App Control
Allright, all the configuration is done. Let’s it in action and let’s see whether we can actually delete the policy when being a local administrator.
Firstly, check whether the policies are deployed:
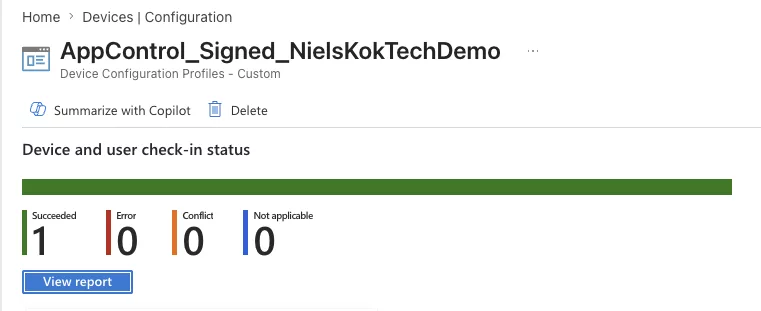
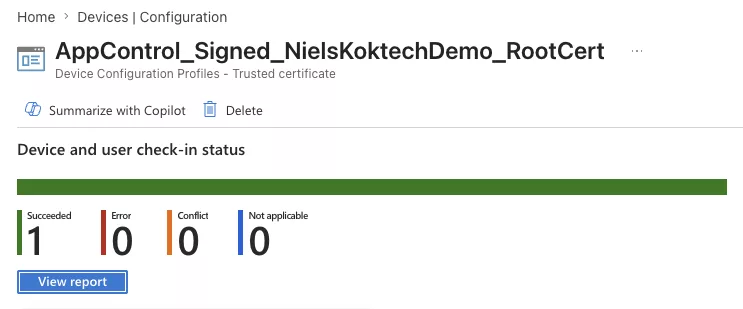
That looks good, now check the device, this looks good also:
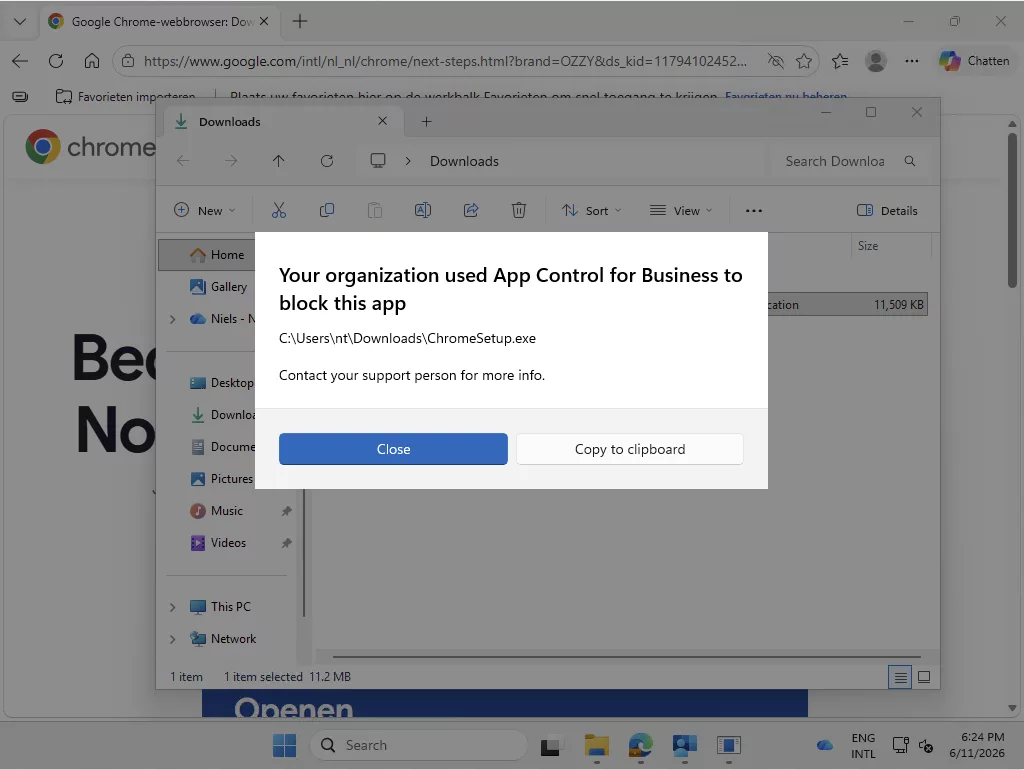
App Control is active and we can’t install Google Chrome.
So, I used my HyperV host to connect to that Virtual Machine using PSRemoting and the LAPS account which is local admin. Remember, if you use virtual machines the owner of the hardware is owner of the VM. 😉

If we list the current active policies by using this command:
citool.exe --list-policies
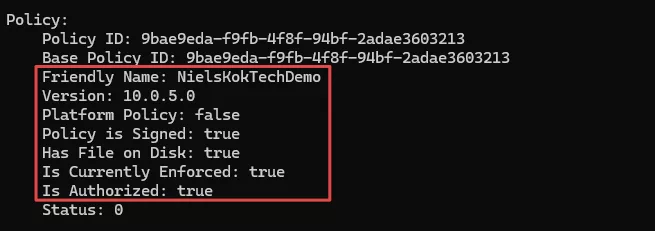
it shows as signed:
Now, it is time for the actual test. Let’s try to delete these policies with the citool and see what happens:

The weird thing is that it shows that it successfully removed the policy but when we list the active policies again, it is still active:
The CItool deletes the .cip file from the C:\Windows\System32\CodeIntegrity\CIPolicies\Active folder but since it is signed and this item is disabled:
The anti-tampering protection keeps the policy loaded and active which is very important. This actually makes sure that an attacker can’t remove this policy.
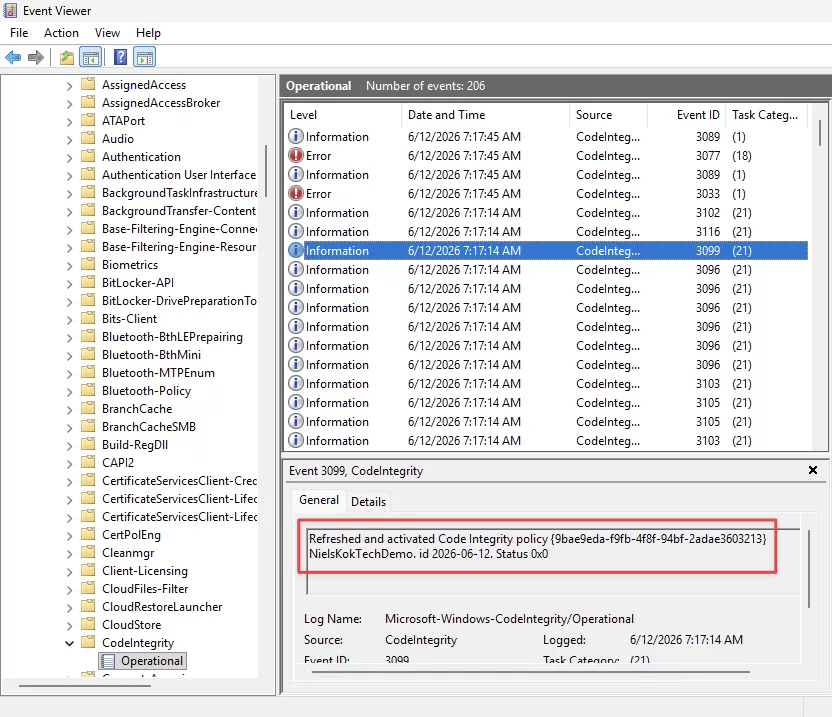
Even after a reboot, the policy is still active and I can’t install Google Chrome for example.
Also, the event viewer still shows that the policy is active:
Even if you don’t want to use App Control to prevent certain applications from being installed it might be worth looking into allow everything with a signed policy. Then the attack to deploy an App Control policy that disables defender is not possible without your code signing certificate.
A final note, the process is quite cumbersome and this must be automated. I might do a post on how to automate this stuff.